10 Baby’s First Christmas Crafts to Make Together
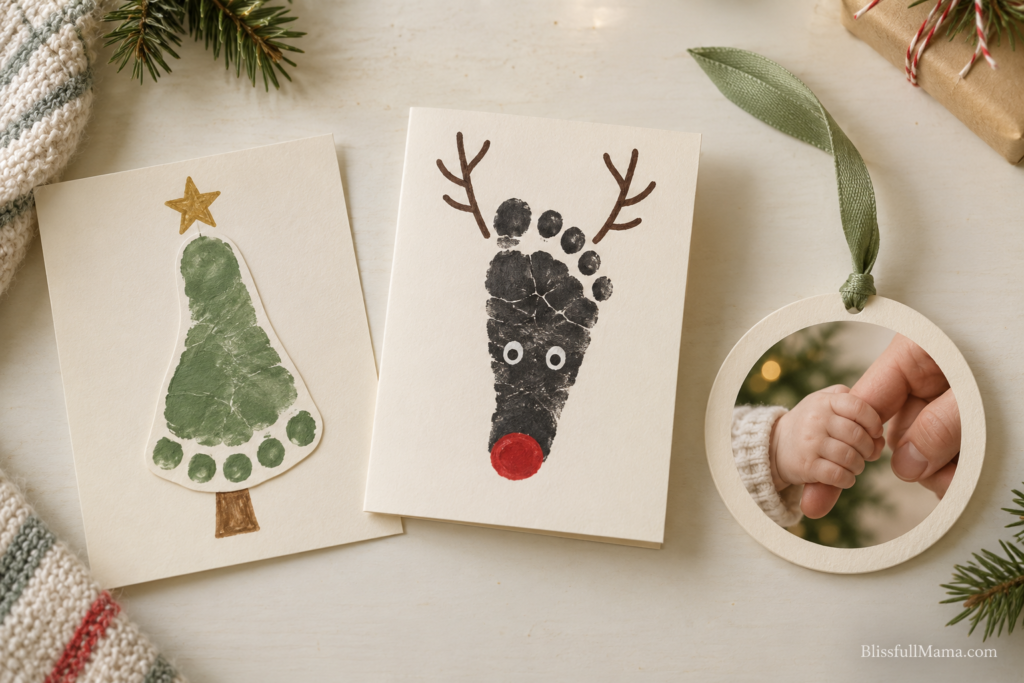
Baby’s first Christmas crafts can be as simple as one tiny footprint, a favorite photo, and a few quiet minutes together.
As a mom of four boys, I know how quickly those baby days turn into the next stage. I want to remember the little details, but I also know how full a day can feel when someone needs feeding and the laundry is waiting.
But those little details are exactly what you might want to keep: the size of their toes, the way their hand curls around your finger, and how small they look in your arms.
I’d choose a project I could finish in short bursts. Your baby may be happy to contribute a footprint and then immediately request a change of plans. Leave the cutting and decorating for a moment that suits you.
These baby’s first Christmas crafts are mostly adult-made projects with a little contribution from your baby. You’ll handle the scissors, glue, lettering, and decorations. Your baby might contribute a footprint, a hand outline, or simply a moment you capture in a photo.
Choose the one you would most like to find in your memory box years from now. You can leave the others for another day, or another family.
Disclosure: This post contains affiliate links. As an Amazon Associate, I earn from qualifying purchases.
You can also browse my (AD) Amazon storefront for more family finds.
Before You Start: Baby’s First Christmas Crafts
For baby’s first Christmas crafts with a child under one, I’d start with photos, gently traced outlines, or a clean-touch print kit intended for babies rather than ordinary craft paint.
Follow the instructions and sizing limits on your chosen kit. A clean-touch ink pad works through a barrier, with your baby touching the clean side and the ink facing the paper.
Pearhead’s small pad, for example, fits hands or feet up to 2.25 by 3.5 inches and is intended for a maximum of two uses. One pad won’t make every print in this list; you can photograph a successful print and use copies for additional projects.
To make the experience easier:
- Set up first. Have your paper and supplies ready before bringing your baby over.
- Choose a comfortable moment. Try when your baby is awake, settled, and happy.
- Follow your baby’s lead. Stop if they pull away or become upset.
- Have a backup. Don’t force open a tightly curled hand. A footprint or photo works beautifully.
- Finish the decorating later. Your baby doesn’t need to stay beside you while you cut and glue.
Keep scissors, glue, ribbons, and small decorations in the adult work area. Skip loose glitter, beads, buttons, and googly eyes around your baby; draw the details instead.
Finished keepsakes are decorations, not baby toys, and should stay out of reach. The American Academy of Pediatrics recommends avoiding sharp or breakable decorations and keeping small removable parts away from young children.
A helpful supply to consider: (AD) Shop Pearhead clean-touch ink pads on Amazon.
Keep the little details you’ll want to remember
Get my free Baby’s First Christmas Keepsake Pages, with simple backgrounds for a footprint tree and reindeer card, plus a photo keepsake and memory page. Choose one and make it your own.
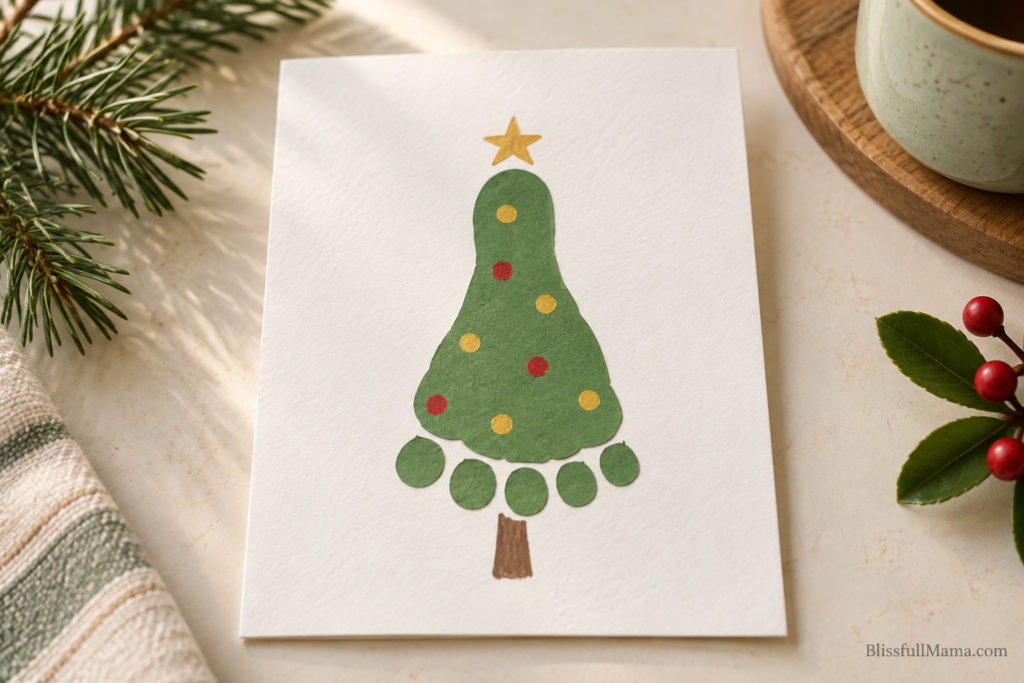
1. Baby Footprint Christmas Tree Keepsake
Illustrative craft example
Baby’s contribution: One footprint, or an existing footprint you copy.
You’ll need:
- A baby clean-touch print kit
- Cardstock
- Green paper
- Pencil
- Scissors and glue for adult use
- Marker
I’d start with this one if I wanted a keepsake that showed my baby’s actual size. There’s something about a tiny footprint that makes me want to write the date on it before another week slips by.
You’ll turn its outline into a simple Christmas tree, with the heel at the top and the wider toe end at the bottom.
How to Make It
- Capture a footprint following your kit’s directions. Let it dry before handling it.
- Photograph or scan the print. Keep the original for your baby book if you’d like.
- Trace the footprint’s outer shape onto green paper and cut it out yourself.
- Glue the green shape onto cardstock, with the narrow heel pointing up.
- Draw a trunk underneath, a star above, and a few decorations inside the tree.
- Add your baby’s name, the year, and “My First Christmas.”
If preserving the exact size matters to you, check that your print or copy hasn’t been resized before tracing it.
Leave a little space around the tree rather than filling the whole page. The tiny shape is what makes this keepsake special.
Make it easier: Skip the cutting. Mount the original footprint on cardstock and draw a Christmas tree beside it. You still have the tiny toes, which are the whole reason for making it.
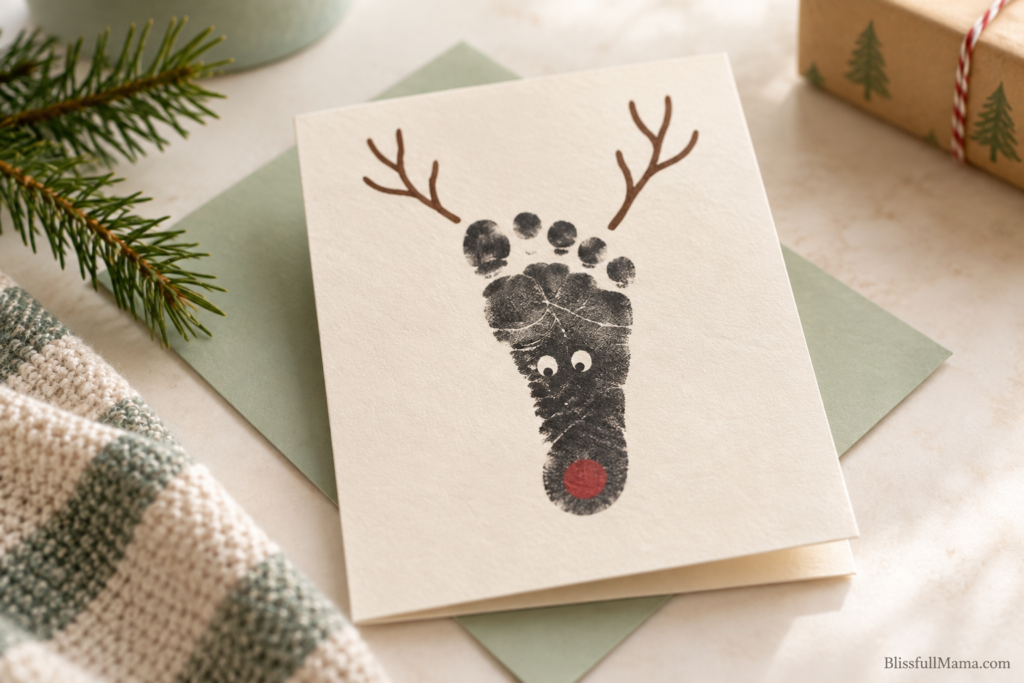
2. Tiny Footprint Reindeer Card
Illustrative craft example
Baby’s contribution: A footprint.
You’ll need:
- A clean-touch print kit
- Folded cardstock
- Red marker
- Brown or black marker
- Glue for adult use
I like this as a card for grandparents because the footprint makes it personal before you’ve even written a message. I’d copy one good print for extra cards. Baby doesn’t need to run a Christmas stationery business.
You don’t need a brown print. A black footprint with drawn antlers and a red nose gives you the same playful idea.
How to Make It
- Make a print on the supplied card and let it dry.
- Glue the print onto the front of a folded greeting card.
- Position it with the toes pointing upward.
- Draw antlers above the toe end, eyes in the middle, and a red nose near the heel.
- Write “A Little Reindeer’s First Christmas” underneath.
Inside, you could add:
My feet are tiny, but I’m already leaving a big footprint on your heart.
Then write your baby’s name and the date.
If you’re making cards for several relatives, copy one successful footprint rather than trying to capture a fresh print for everyone.
Make it easier: Use a copy of the footprint from the first craft. There’s no need to ask your baby for another print just because you’re making a second keepsake.
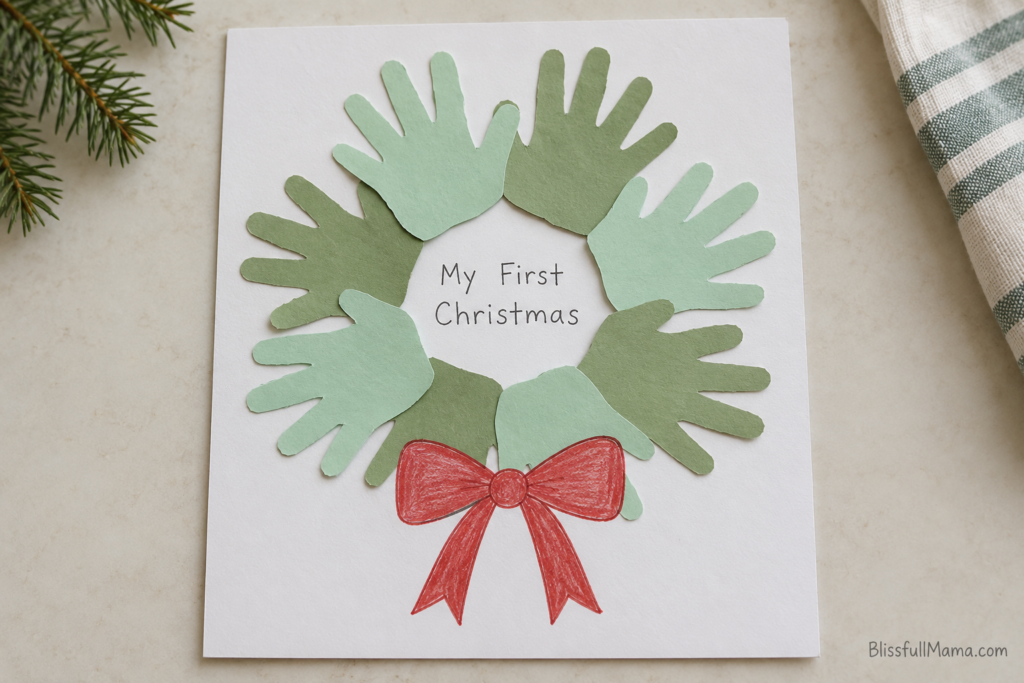
3. Baby Handprint Christmas Wreath
Illustrative craft example
Baby’s contribution: A handprint or a gently traced hand outline.
You’ll need:
- Green paper
- Cardstock
- Pencil
- Scissors and glue for adult use
- Red marker
This wreath uses several copies of the same little hand shape. The fingers create the leafy edges, while the center gives you room to write your baby’s name and the year.
I like that you only need one hand outline for this wreath. Once you have it, you can finish the rest later without asking your baby to sit through eight more attempts.
How to Make It
- Use an existing handprint as a template, or gently trace your baby’s relaxed hand if they’re comfortable.
- Cut out the template yourself.
- Trace it several times onto green paper and cut out the shapes.
- Arrange the hand shapes around a lightly drawn circle on cardstock. Let the fingers point outward.
- Glue the shapes down and draw a red bow at the bottom.
- Write “Our Little One’s First Christmas” in the middle.
Take a quick photo of the arrangement before gluing if you’re worried about forgetting where everything goes.
You can use two shades of green if you already have them, but one color is absolutely enough.
Make it easier: Use one hand outline as a little tree instead of making a full wreath. If your baby keeps their fist closed, switch to a footprint project and save handprints for later.
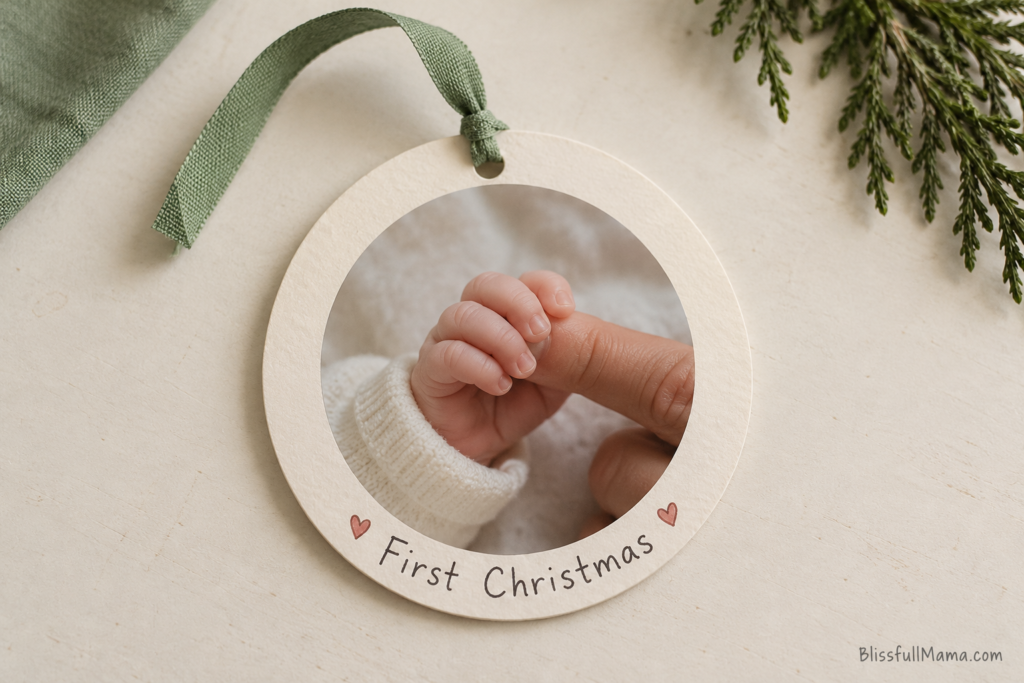
4. First Christmas Photo Ornament
Illustrative craft example
Baby’s contribution: Being in a favorite photo.
You’ll need:
- Printed photo
- Sturdy cardstock
- Scissors and glue for adult use
- Marker
- Hole punch
- Ribbon handled by an adult
Of these baby’s first Christmas crafts, the photo ornament is the one I’d choose when there’s no energy left for prints or cleanup. I’d give myself one rule: pick the photo before sitting down to craft. Otherwise, looking through baby pictures could easily become the whole activity.
You can use a photo you already love. It doesn’t need to be a professional picture or show your baby wearing a special outfit.
A close-up of their tiny hand wrapped around your finger would make a beautiful keepsake, too.
How to Make It
- Cut a circle or oval from sturdy cardstock.
- Glue a photo onto the front, leaving space for a narrow border.
- Add your baby’s name and “First Christmas” on the back.
- Write the year and one small detail you want to remember, such as a favorite song or a nickname.
- Punch a hole near the top and thread a short hanging ribbon through it.
Hang it where your baby cannot reach it. A paper ornament still isn’t something to mouth or play with.
Make it easier: Leave off the ribbon and tuck the photo card into a memory box.
If you regularly print family photos, the Canon SELPHY CP1500 is an optional bigger purchase to consider for future albums and keepsake projects. Canon lists wireless printing options, including AirPrint and its photo-layout app. You can also order a single photo print for this craft.
(AD) Shop the Canon SELPHY CP1500 on Amazon.
5. Baby’s First Christmas Memory Page
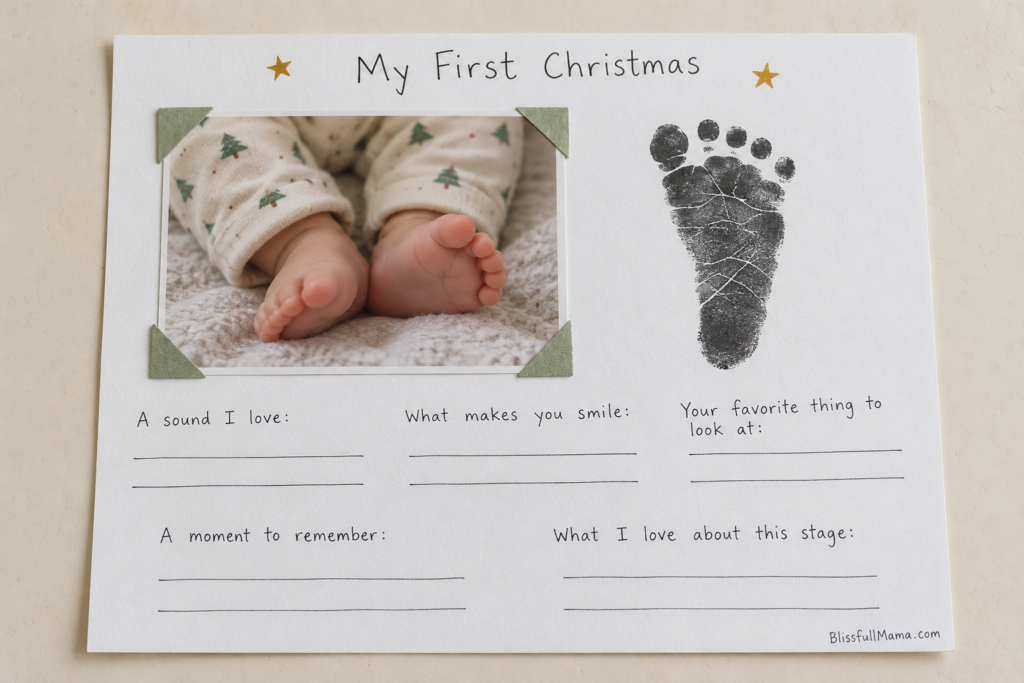
Illustrative craft example
Baby’s contribution: A photo, a print, and all those little things you want to remember.
You’ll need:
- Sheet of cardstock
- Printed photo
- Pen
- Optional copies of a handprint or footprint
Some keepsakes are meaningful because they show how small your baby was. This one also remembers who they were becoming.
It’s an especially good choice if you want to make something personal without needing much craft time.
How to Make It
- Write “My First Christmas” at the top of the page.
- Add a favorite photo and your baby’s age that December.
- Include a handprint or footprint if you already have one.
- Finish a few short prompts.
- Add the date and keep the page in an album or memory box.
Try these prompts:
- A sound you make that I love…
- Something that makes you smile…
- Your favorite thing to look at…
- A little everyday moment I want to remember…
- What I love about this stage…
I’d write this page the way I’d tell someone about my baby: the funny little sound, the song that gets a smile, or who they look for when someone enters the room. I wouldn’t worry about making the words sound polished.
“You grin whenever your brothers walk into the room” says so much more than a perfectly polished sentence.
And if all you manage is a photo with a few handwritten words underneath, that is still something your future self may be very happy to have.
Make it easier: Write three lines beside one photo. That counts.
For another gentle way to spend time together, browse my favorite books for 1-year-olds. And if your baby is approaching their first birthday, my Christmas gifts for 1-year-olds guide has ideas for that next stage.
6. Tiny Footprint Snowman Picture
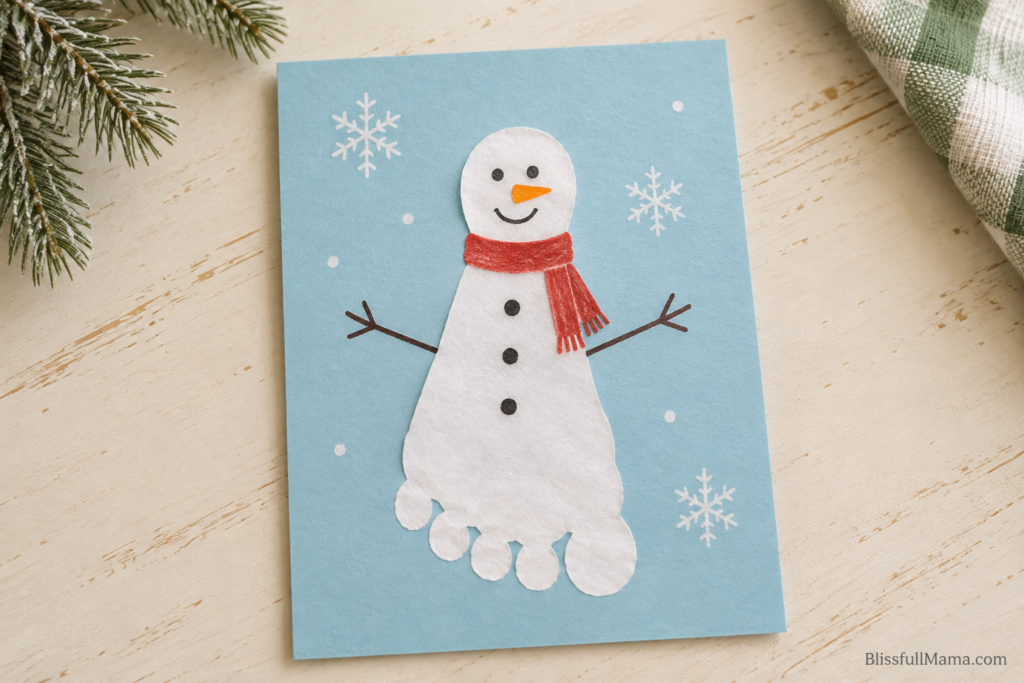
Illustrative craft example
Baby’s contribution: A footprint you have already captured.
You’ll need:
- A copy of your baby’s footprint
- White paper
- Blue cardstock
- Scissors and glue for adult use
- Markers
I’d use a copy of the footprint I already had for this snowman. That leaves me with just the paper decorating to do, and gives baby the rest of the afternoon off.
The footprint becomes the snowman’s body, with the rounded heel at the top as its head. You can finish the whole picture yourself after your baby’s part is done.
How to Make It
- Use your baby’s footprint as a template to trace its outer shape onto white paper.
- Cut out the shape yourself and glue it onto blue cardstock, with the heel pointing upward.
- Draw eyes, a smile, and a little orange carrot nose near the heel.
- Draw a scarf across the narrow middle of the footprint and stick arms extending from the sides.
- Add a few drawn snowflakes and write “My First Christmas” underneath.
- Finish with your baby’s name, age, and the year.
Draw the buttons directly onto the paper instead of attaching real ones. This keeps the project simple and avoids loose decorations around your baby.
Make it easier: Use the original dark footprint on white cardstock and turn it into a snowman silhouette. The keepsake doesn’t have to follow traditional colors.
7. Baby Hand-Size Christmas Mitten Garland
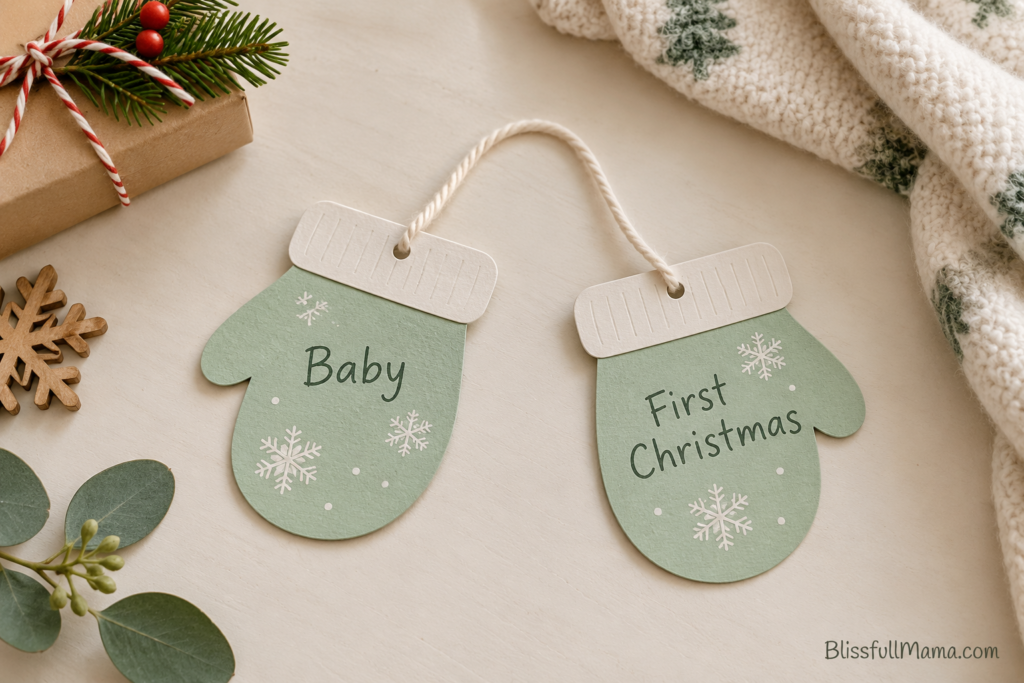
Illustrative craft example
Baby’s contribution: The outline of a relaxed hand, or a handprint you already have.
You’ll need:
- Colored cardstock
- A hand outline
- Pencil
- Scissors for adult use
- Marker
- Hole punch
- String handled by an adult
I like the two-mitten version because it feels manageable. I’d finish that little pair first, then decide whether I had the time or patience to make a whole family garland.
You can make just two mittens or add larger ones for everyone in the family. Seeing the smallest pair beside the bigger ones makes this especially sweet.
How to Make It
- Place an existing hand outline on colored cardstock.
- Draw a loose mitten shape around it, with a rounded finger section and a separate thumb. No need to trace every finger.
- Add a small cuff at the wrist and cut out the shape yourself.
- Use that mitten as a template for a matching second one.
- Write your baby’s name on one mitten and the year on the other.
- Punch holes through the cuffs and thread them onto string.
Because the mitten has a little extra space around the hand, write “Made from your hand outline” on the back rather than treating it as an exact hand measurement.
Display the garland where your baby cannot reach the string or paper pieces. Keep it away from the crib and other sleep spaces.
Make it easier: Glue the two mittens onto a card and draw a line connecting them. You get the same little pair without using string.
8. Family Handprint Christmas Tree Collage
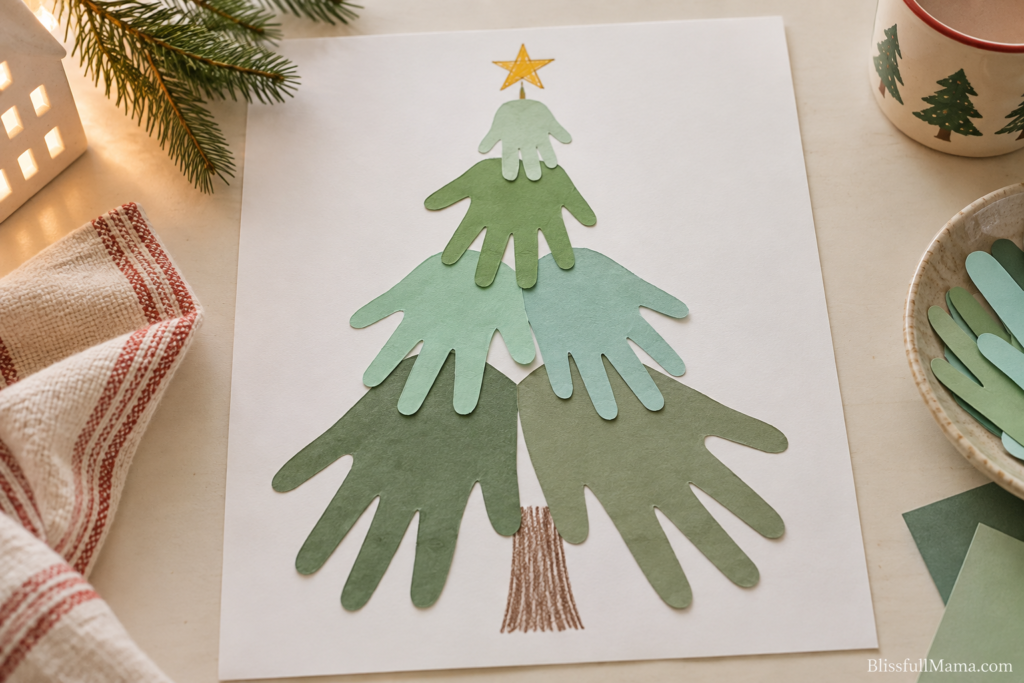
Illustrative craft example
Baby’s contribution: A small hand outline added to everyone else’s.
You’ll need:
- Family hand outlines
- Green paper in any shades you have
- Cardstock
- Scissors and glue
- Marker
If you’re choosing baby’s first Christmas crafts that older siblings can help with, I’d start with this family tree.
Baby’s first Christmas becomes a little snapshot of the whole family, with everyone’s hand included.
With four boys, I like the idea of giving each older child a job of his own. I’d let them choose their paper or write their names, and leave room for a slightly lopsided tree. I wouldn’t expect a family craft committee to agree on every branch.
How to Make It
- Trace each willing family member’s hand onto green paper. Use a saved print or outline for your baby.
- Have an adult cut out the shapes; older children can help with age-appropriate scissors and supervision.
- Arrange the larger hands near the bottom of a sheet of cardstock.
- Overlap smaller hands above them to create a broad triangular tree shape. Let the fingers point downward or outward like branches.
- Place your baby’s hand shape near the top, below a drawn star.
- Glue everything down and label the hands with names.
Add “Our Family, Your First Christmas” and the year underneath.
The tree might lean a little. The hands might overlap unevenly. It will still show exactly what makes this year different: there is one more little person in your family.
Make it easier: Arrange the hand shapes side by side and draw a small tree above them. A family collage doesn’t need to become a complicated puzzle.
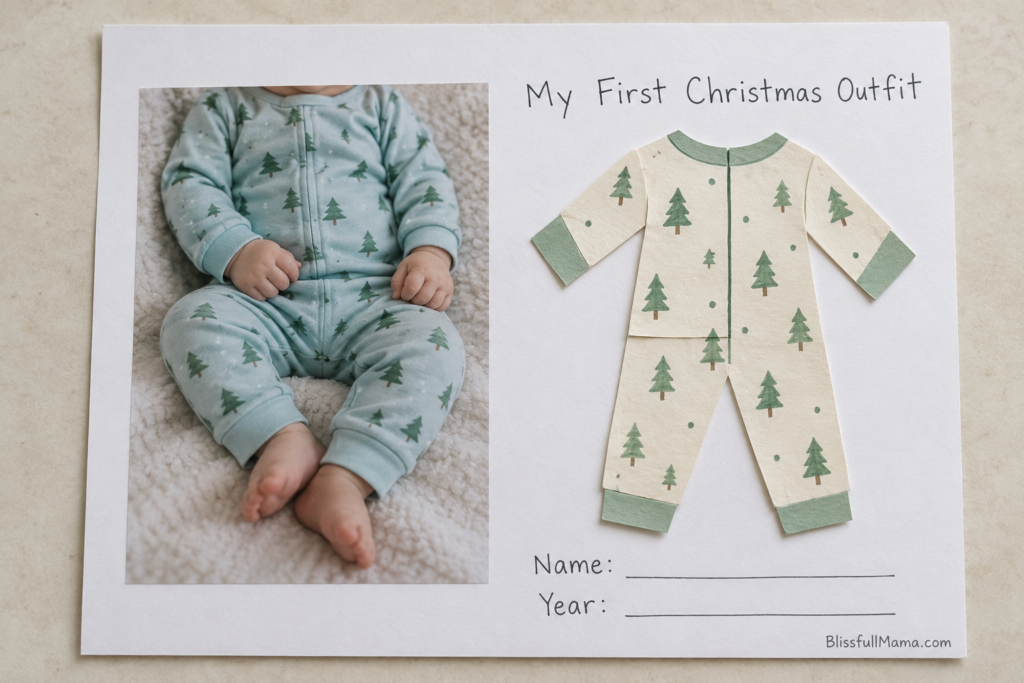
9. First Christmas Outfit Keepsake Picture
Illustrative craft example
Baby’s contribution: A photo wearing a little outfit you want to remember.
You’ll need:
- Printed photo
- Cardstock
- Colored paper
- Pencil
- Scissors and glue for adult use
- Pen
I’d choose an outfit that reminds me of an ordinary day with my baby, even if it wasn’t bought for Christmas. A familiar pair of pajamas would mean more to me than something chosen just for the picture.
This craft lets you remember a favorite outfit while keeping the actual clothing intact. It can be festive pajamas, a little cardigan, or an ordinary outfit you associate with those early months.
How to Make It
- Choose a photo of your baby wearing the outfit.
- Cut a simple paper onesie, pajama, or sweater shape yourself. Make it small enough to fit beside the photo.
- Draw a few details that echo the outfit: stripes, a little pocket, or its main color.
- Glue the photo and paper outfit onto cardstock.
- Write your baby’s name, the year, and one sentence about why you chose it.
Try a caption such as:
The little pajamas you wore while we read together in December.
Only include a memory that is true for your family. Ordinary details are often the ones that become meaningful later.
Make it easier: Skip the paper outfit and draw its outline beside the photo. You can finish this keepsake with just paper, a photo, and a pen.
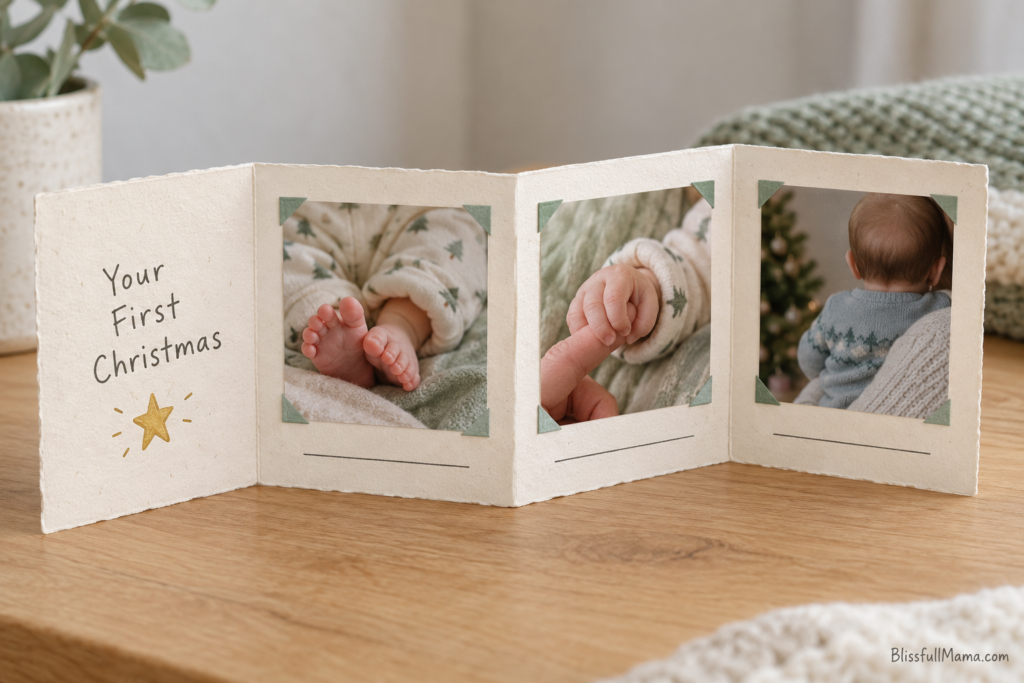
10. Baby’s First Christmas Accordion Photo Book
Illustrative craft example
Baby’s contribution: A few small moments captured in photos.
You’ll need:
- A long strip of cardstock
- Three or four printed photos
- Glue
- Pen
I’d choose this little book if I wanted baby’s first Christmas crafts made with photos instead of prints. It can stand on a shelf out of reach or fold flat into a memory box.
I’d choose photos from different little moments rather than arrange a special photo shoot. A close-up of their feet beside a picture with their brothers would tell me more about that stage than matching outfits ever could.
How to Make It
- Fold a strip of cardstock back and forth into four equal panels. Choose a strip wide enough for your photos.
- Use the first panel as a cover: “Your First Christmas,” your baby’s name, and the year.
- Glue one photo onto each remaining panel, keeping the pictures clear of the folds.
- Add a short caption below each photo.
- Let the glue dry before folding the book closed.
You could include:
- Tiny feet in pajamas
- A little hand holding yours
- A moment with siblings
- Your baby looking toward a decoration from a comfortable distance
Keep this as an adult-handled keepsake rather than giving it to your baby as a board book.
Make it easier: Use two photos on a single folded card. It will still tell a little story about your baby’s first Christmas.
How to Store Baby’s First Christmas Crafts
After making something, give yourself one small finishing job: write the name and year on it before putting it away.
I’d write the name and year on the back before clearing the table. With four boys, I’m very much in favor of giving my future self a clue.
A few simple habits will help:
- Let everything dry completely. Give ink and glue time to dry before stacking or storing the projects.
- Store paper projects flat. Use a folder, album, or box, away from damp areas and direct sunlight.
- Choose acid-free materials when buying storage supplies. They’re a sensible choice for paper keepsakes you want to keep long term.
- Take a backup photo. Photograph each finished craft before putting it away.
- Keep the original print when possible. Use copies for extra cards or decorations, especially if you want to preserve the actual size.
You don’t need to save every attempt. Choose the keepsake you love, label it, and give it a home.
Baby’s First Christmas Crafts: Frequently Asked Questions
What Can a Newborn Do for a Christmas Craft?
A newborn’s contribution can simply be a photo.
An adult can turn it into an ornament, memory page, or little photo book. A footprint may be another option with a suitable baby print kit used according to its instructions, if your baby is comfortable.
Your baby doesn’t need to hold supplies or stay involved while you finish the project.
Can I Use Ordinary Washable Paint on My Baby?
For these projects, I would choose a photo, traced outline, or baby clean-touch print kit instead.
Don’t assume that “washable” or “non-toxic” means a product is appropriate for an infant. Check the specific product’s age guidance and directions.
For context, Crayola’s toddler range includes supplies designed for ages 12–36 months; toddler supplies shouldn’t automatically be treated as infant supplies.
What If My Baby Won’t Open Their Hand?
Don’t force it.
Use a footprint, an existing hand outline, or a photo of their little fist. You can make a handprint keepsake another time.
There’s no deadline for capturing every tiny detail in one afternoon.
Can Older Siblings Help?
Yes. Older children can choose colors, draw details, write captions, and contribute their own hand outlines.
Keep baby’s print session separate from scissors, glue, and small supplies.
For a simple activity afterward, choose a book together from my favorite books for 1-year-olds, checking the individual book’s suitability for your child.
What Is the Easiest Baby’s First Christmas Craft?
The photo ornament is the simplest choice if you already have a printed picture.
The memory page is another easy option: one photo, your baby’s age, and three things you want to remember.
Choose whichever feels manageable with the supplies and energy you have today.
A Small Keepsake Is Enough
I don’t want this list to give you ten more things to feel behind on. I’d pick the one keepsake I wanted most and leave the rest. There’s already plenty to do when you have a baby.
You can capture the footprint today and finish the card another afternoon. I’d rather spread a project over a few days than keep going once everyone has had enough.
A slightly blurry photo or an imperfect footprint can hold just as much meaning as a carefully arranged project.
Years from now, the little toes and handwritten date may be what you notice first. You made something that helps you remember this stage, and that is enough.
If you’re planning presents for a baby approaching their first birthday, take a look at my Christmas gifts for 1-year-olds.
You can also browse my (AD) Amazon storefront for more family finds.
Which keepsake would you choose: a tiny footprint, a photo ornament, or a little memory book? Tell me in the comments.
Want a simple starting point? Sign up below for my free Baby’s First Christmas Keepsake Pages, with footprint backgrounds, a photo-card frame, and a memory page you can fill in a few minutes.