10 Winter Crafts to Keep Kids Entertained Indoors
Winter crafts for kids give me a starting point for those afternoons when everyone is indoors and the boys need something to do together.
My four boys enjoy making things side by side, so I like projects that let them share the table without needing to make identical pictures.
One child can spend time designing a snowman’s scarf while another is happy gluing down the biggest paper circles he can find.
With boys aged nine, seven, four, and two, I can’t expect the same activity to work the same way for everyone.
I look for a simple base project, then leave room for the older boys to add details. My youngest can join me with large paper shapes or age-appropriate crayons while his brothers work on their own versions.
These ten winter craft ideas include paper projects, a little washable paint, and ready-to-make Amazon kit options.
This post contains affiliate links. As an Amazon Associate, I earn from qualifying purchases.
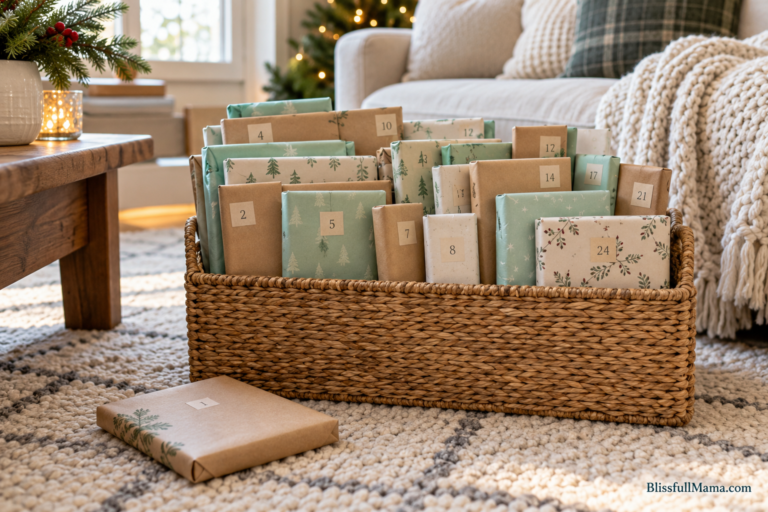
Get Your Free Winter Craft Basket Pack
Want a few shapes ready before everyone gathers at the table? Sign up for my emails to get the Winter Craft Basket Pack, with snowman circles, a mitten outline, penguin pieces, a paper snow globe template, and a supply checklist. Print the pages you need and let your kids choose their colors.
Set Up for the Craft You’re Actually Making
I’d start with construction paper, glue sticks, washable markers, and child-size scissors. Keep paint in the cupboard until you choose a painting activity.
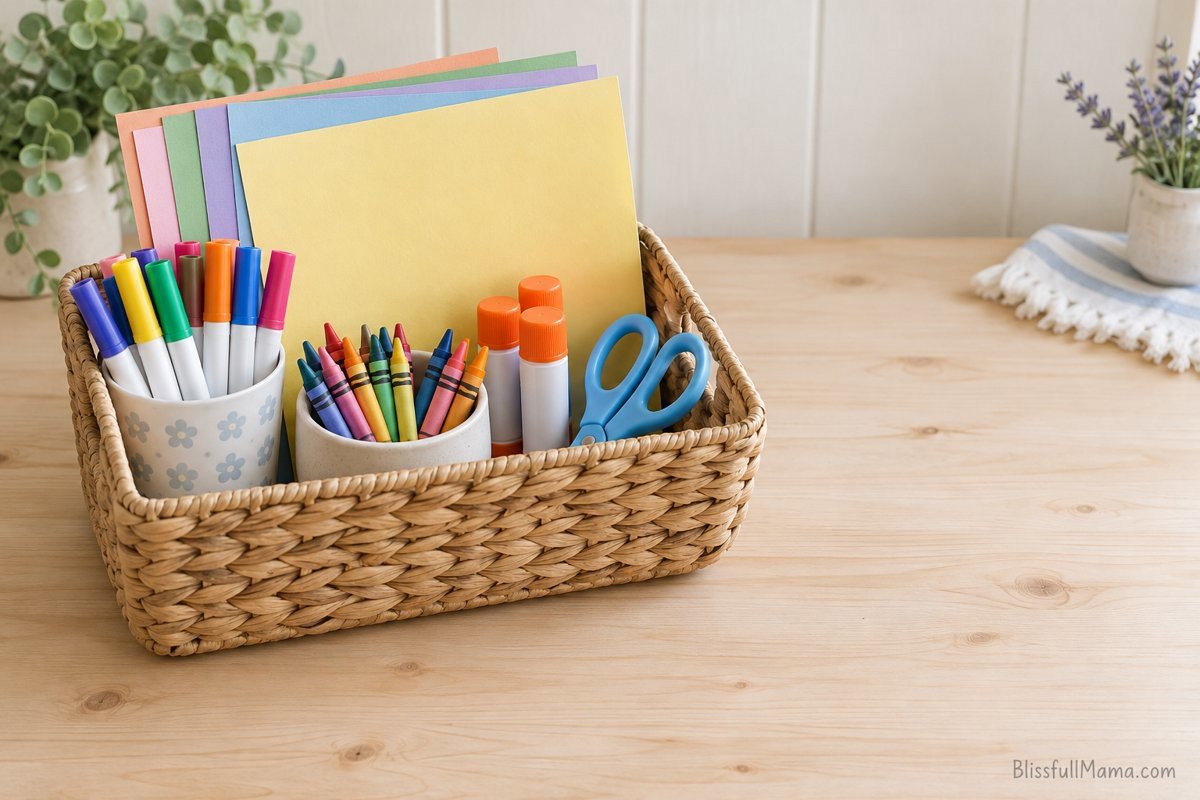
Give each child a tray or a sheet of scrap paper as a workspace. For paint, protect the table and have a damp cloth ready before opening the bottle. Leave a clear place for wet pictures to dry so nobody has to carry one across the room looking for space.
For ready-to-make kits, check the age label, the piece sizes, and how many complete projects the pack makes. A large piece count doesn’t tell you how many children can make their own finished craft. Check whether glue, paint, and brushes are included, too.
Keep small decorations, beads, sequins, and loose eyes away from children under three and any child who still mouths objects. Adult supervision doesn’t make an older child’s kit suitable for a toddler. I’d give my youngest a separate paper-and-crayon version beside me.
If your table is already carrying school papers and packages, my before-the-holidays home reset can help you make room for family activities. Start with enough space for the project you’re doing today.
You can also browse (AD) my Amazon storefront for kids’ activities and family finds.
Ordering craft supplies and other household items regularly? (AD) Check Amazon Prime’s current membership options and see whether the available delivery benefits fit your shopping habits.
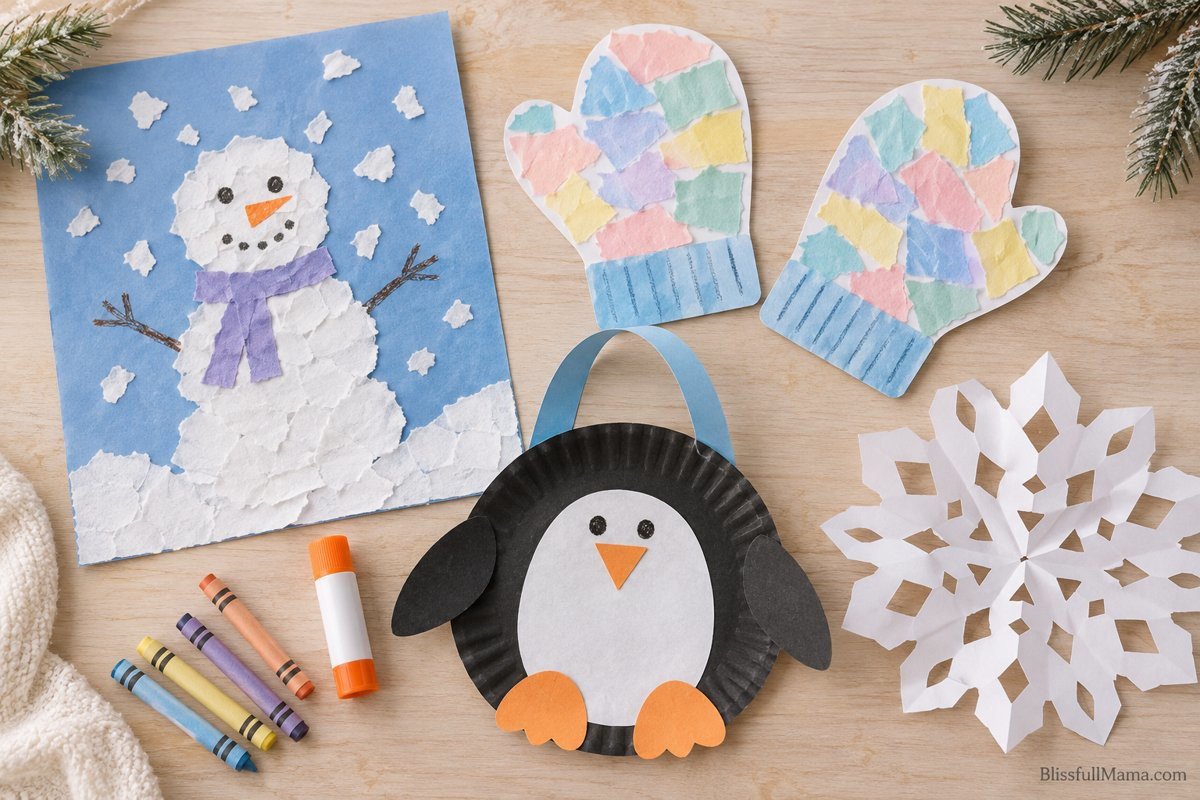
1. Torn-Paper Snowman Pictures
I’d start here on a day when I want very little preparation. Tearing the paper is part of the activity, so there’s no pile of tiny shapes for me to cut beforehand. Each child can make a snowman with a different hat, expression, or wildly oversized scarf.
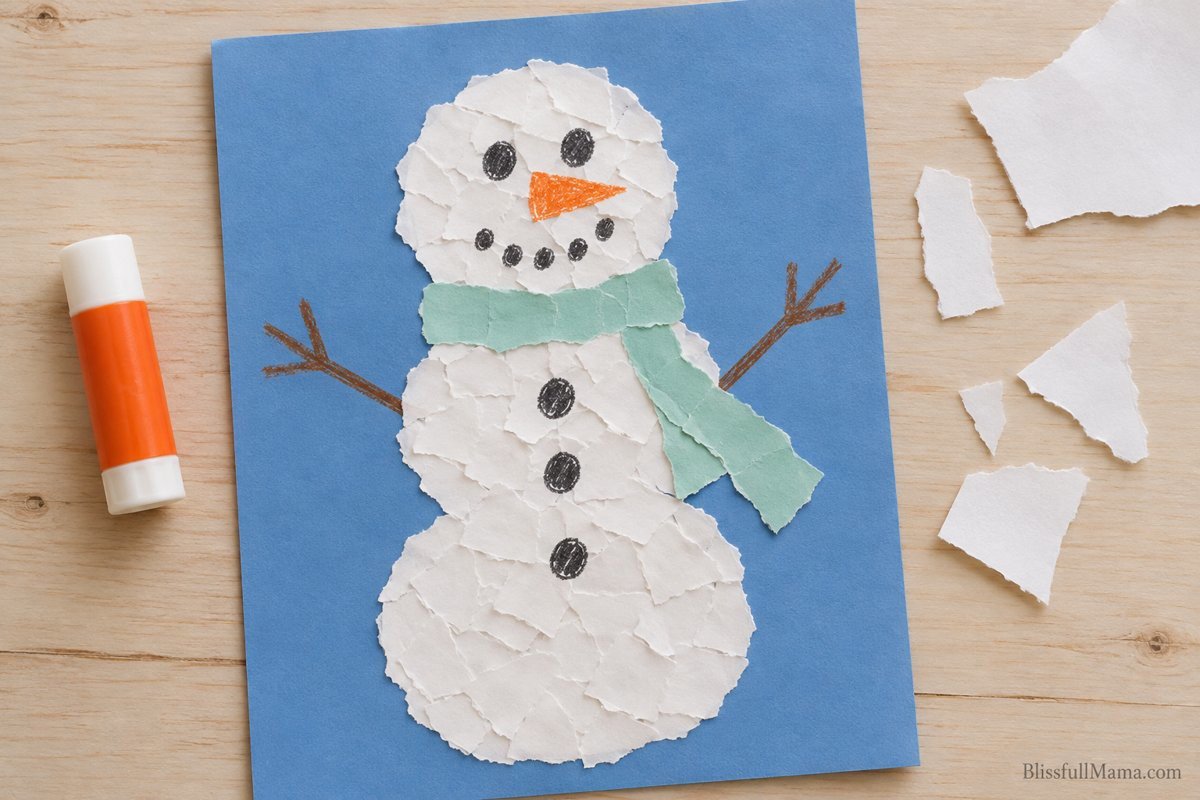
Suggested ages: preschool and elementary, with help as needed. A toddler can join with large paper pieces and close adult support.
What You’ll Need
- Blue construction paper
- White paper
- A glue stick
- Orange and black crayons or markers
- Colored paper scraps or crayons for a scarf
How to Make It
Draw two or three circles on the blue paper. Let your child tear white paper into pieces, spread glue inside the circles, and press the scraps down. Bigger scraps are easier for little hands to manage. If your child wants a snowman with one enormous head, let that be the plan.
Draw the eyes, carrot nose, and arms once the paper is attached. Add a paper scarf or color one with a crayon. I’d draw the buttons rather than bring real buttons to a table shared with a toddler.
Older kids can add a sled or a family of snowmen. A preschooler might prefer to make one snowman head and stop there. Both versions give them something to show each other afterward.
Mess and Cleanup
Expect paper scraps and a little sticky glue on fingers. Keep the scraps on the tray, then collect them before wiping the table. There’s no paint drying time to plan around.
Ready-to-Make Amazon Kit Option
A precut snowman foam sticker kit is the type I’d look for if I wanted to skip preparing shapes. Choose a self-adhesive version with enough complete snowmen for the children taking part, and check its age guidance and small parts.
(AD) Browse ready-to-make snowman craft kits on Amazon.
2. Paper Mitten Collages
A mitten outline lets everyone begin with the same shape and take it in a different direction. My boys can choose their own colors, add stripes, or design mittens for a favorite character. Nobody needs to copy my example exactly.
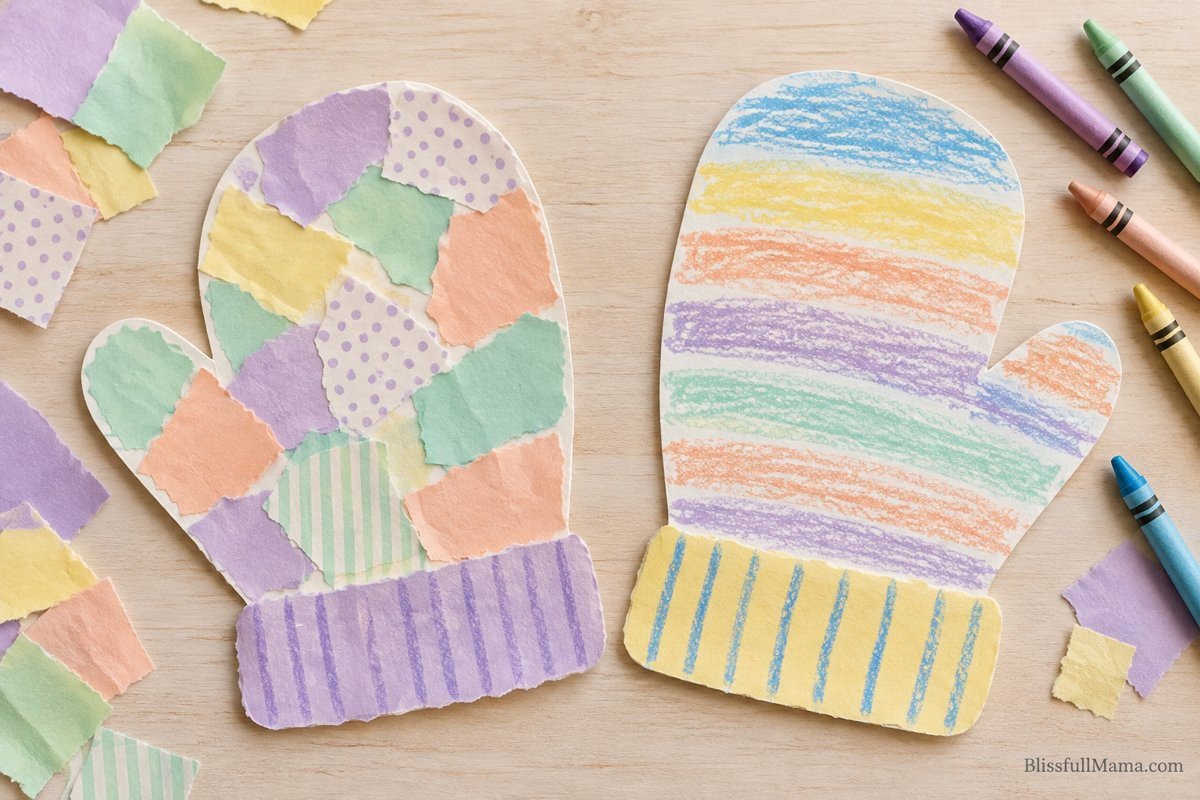
Suggested ages: preschool and elementary. Younger children can decorate a large outline an adult has cut.
What You’ll Need
- Cardstock or construction paper
- Crayons or washable markers
- Colored paper scraps
- A glue stick
- Scissors
How to Make It
Draw a large mitten and cut it out. Let your child color it first, then glue torn-paper patches across the middle. Add a paper strip along the bottom for a cuff, or draw the cuff if you’d prefer fewer supplies.
Older children can make a matching pair and try repeating the pattern on the second mitten. Younger children can choose a few large scraps and press them onto glue you’ve applied. On a busy afternoon, crayons alone are enough to finish the project.
Mess and Cleanup
This is a low-mess activity with scraps and glue-stick residue. Skip glitter and small decorations, especially if younger siblings are sharing the table.
Ready-to-Make Amazon Kit Option
The Kids Crafts Happy Holidays Felt Craft Kit is an option to look up. Its Amazon brand page describes seven sticker craft projects, including a snowman and a mitten. The other designs have a holiday theme, so check the current box if you want winter-only activities.
(AD) Find the Kids Crafts Happy Holidays Felt Craft Kit on Amazon.
Check the package’s age guidance before assigning it to younger children.
3. Paper Plate Penguin Puppets
A penguin puppet gives kids something to play with after craft time. I like the idea of making a character they can name and use in a little show, especially if someone finishes before his brothers.
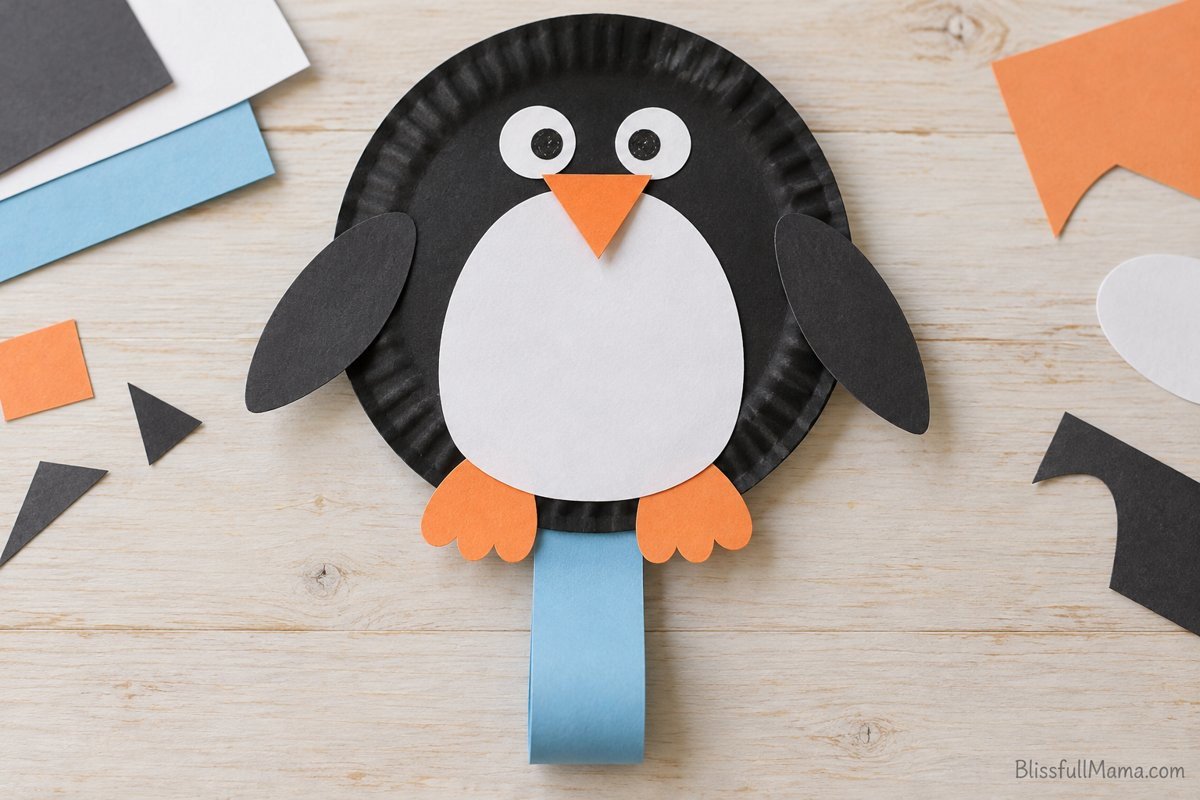
Suggested ages: preschool and elementary, with adult cutting help.
What You’ll Need
- A paper plate
- Black, white, and orange construction paper
- A glue stick
- A black marker
- A wide strip of cardstock and tape for an optional handle
How to Make It
Cover the plate with large black paper pieces, then add a white oval belly. Glue black flippers onto the sides and orange feet near the bottom. Add a beak and draw the eyes on white paper circles.
For children who want a puppet, fold a wide cardstock strip into a firm handle and tape it to the back. Let the glued pieces set before playing. A younger child can keep the penguin as a picture instead.
Older kids can add a scarf or make a second penguin with a different expression. Offer a story prompt if they want one: “Your penguin found a mitten on the ice. Who does it belong to?” A couch cushion can become their stage once the table is clear.
Mess and Cleanup
There will be cut-paper scraps and glue residue. Preparing the younger children’s shapes first keeps the scissors away from their workspace. Gather scraps while the puppets dry.
Ready-to-Make Amazon Kit Option
Look for a penguin foam craft kit with precut, peel-and-stick pieces. These usually make flat decorations, so check the design if your child specifically wants a puppet. You may need to add your own cardstock handle.
(AD) Browse ready-to-make penguin craft kits on Amazon.
4. Paper Snow Globes
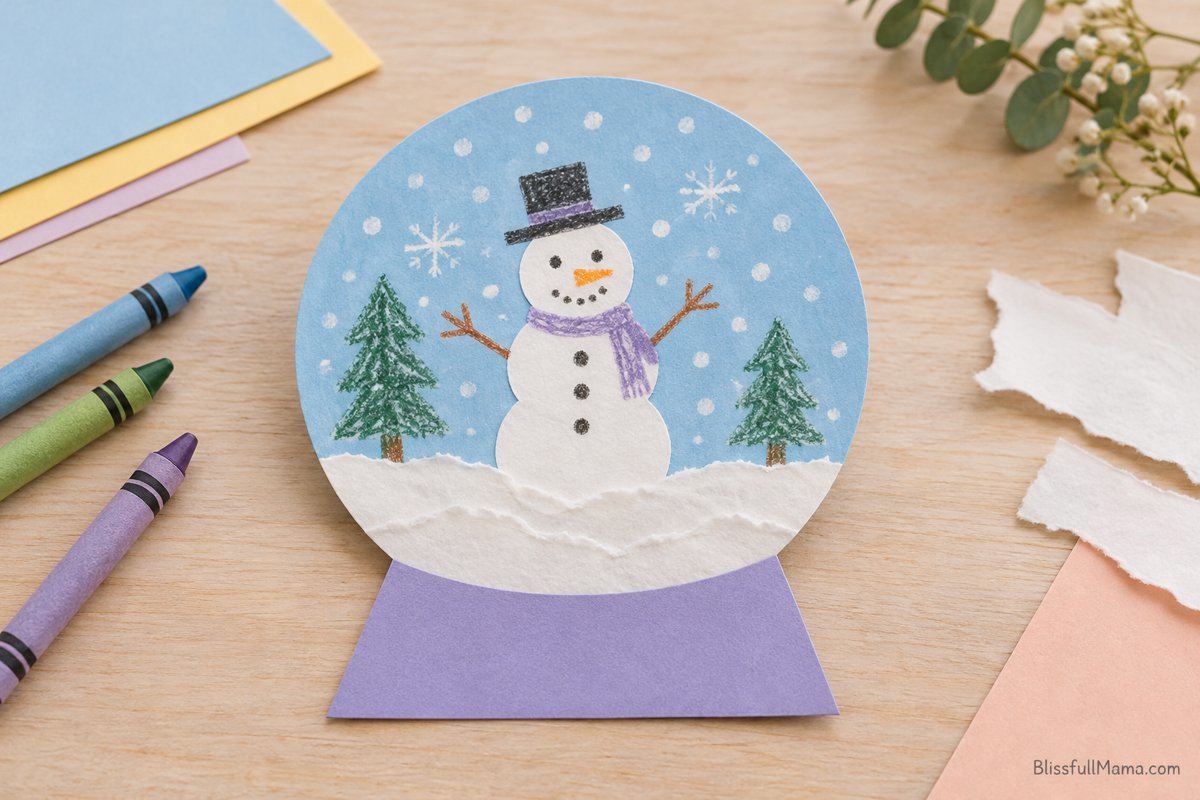
A paper snow globe gives children a small space to create a whole winter scene. One might draw a snowman outside a house. Another might decide a dinosaur belongs in the snow. The same circle works for both pictures.
Suggested ages: preschool and elementary, with cutting help for younger children.
What You’ll Need
- Light blue, white, and colored paper
- Crayons or markers
- A glue stick
- Scissors
- A small plate to trace
How to Make It
Trace the plate onto blue paper and cut out the circle. Cut a wide trapezoid from colored paper for the stand, then glue it behind the bottom of the circle. Leave space on the stand for your child’s name.
Glue a torn strip of white paper across the bottom for snowy ground. Let your child draw the scene above it or build a snowman from paper circles. Add falling snow with a white crayon or small paper scraps.
For younger children, prepare the globe, stand, and one large character shape. Older kids can add windows, footprints, or a snowy village. Glue the finished globe onto folded cardstock if they’d like to turn it into a card.
Mess and Cleanup
The paper version needs only a scrap pickup and a quick table wipe. A real snow globe kit involves water, glitter, and drying or sealing steps, so I’d save it for an afternoon when I can help throughout.
Ready-to-Make Amazon Kit Option
Creativity for Kids Make Your Own Holiday Snow Globes is an option for older children who want a globe they can shake. The manufacturer lists one version for ages six and up with plastic globes, clay, glitter, and holiday figures. Different versions have different contents, so check the exact box before ordering.
(AD) Find Creativity for Kids Holiday Snow Globe kits on Amazon.
Follow the kit’s filling and sealing instructions, and keep the small pieces and glitter away from younger siblings.
5. Fold-and-Cut Paper Snowflakes
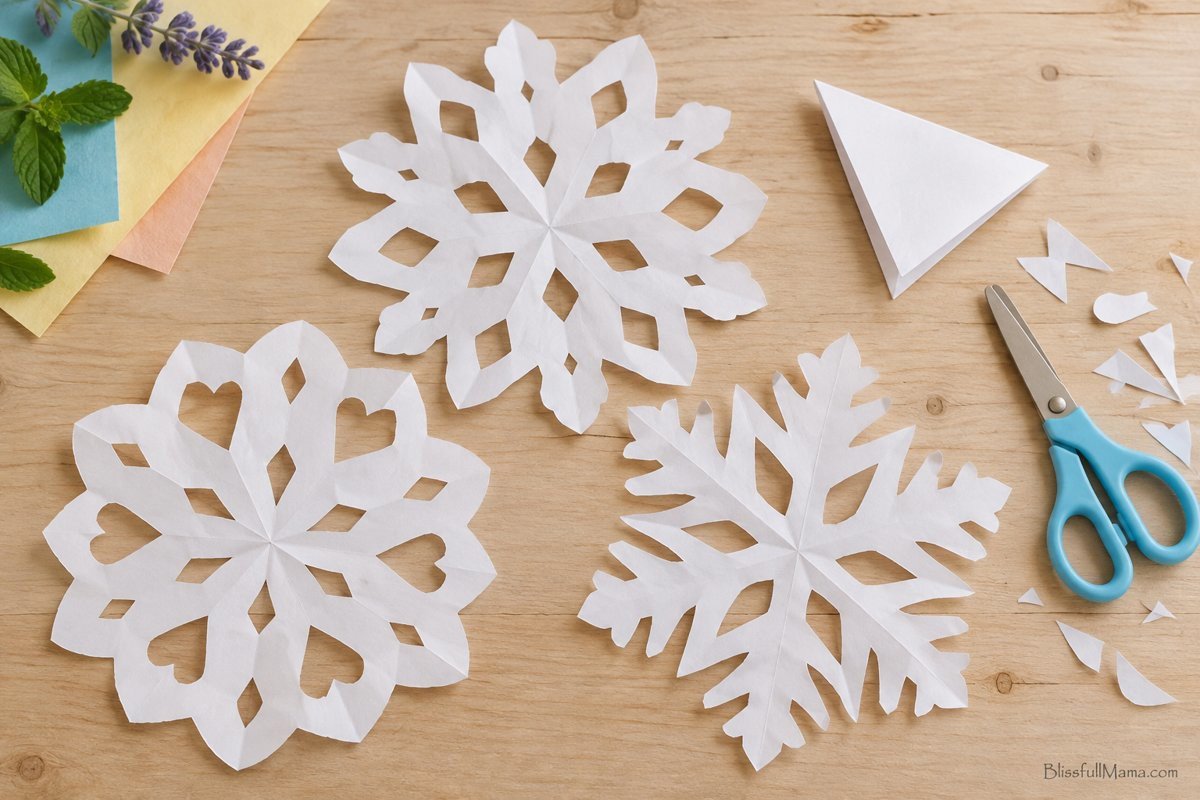
Paper snowflakes suit children who enjoy seeing what happens when they change a design. A few small cuts can make a very different pattern once the paper opens. I’d keep extra sheets nearby so a snowflake that falls apart doesn’t end the activity.
Suggested ages: elementary children who can use scissors with supervision. Younger siblings can decorate an adult-cut snowflake.
What You’ll Need
- Thin white paper
- Child-size scissors suited to your child’s ability
- Crayons or colored pencils
- Tape for displaying finished snowflakes
How to Make It
Start with a square of paper. Fold it diagonally into a triangle, then fold the triangle in half again. This beginner version makes a decorative pattern rather than a true six-point snowflake, but fewer layers are easier to cut.
Cut shallow notches or small triangles along the edges. Leave sections of the folded edges connected so the snowflake stays together. Open it slowly and smooth it flat. If cutting feels difficult, use thinner paper or unfold one layer.
Younger children can color a snowflake you’ve already cut or glue it onto blue paper. Older kids can compare their patterns and try a different cut on the next sheet. Have an adult handle window displays above the children’s reach.
Mess and Cleanup
This creates lots of tiny paper scraps. Cut over a tray, put the scissors away, and tip the scraps into the bin before moving on.
Ready-to-Make Amazon Kit Option
If folded paper is frustrating, a precut snowflake craft kit gives kids shapes to decorate. Foam sticker versions keep the cleanup light. Wooden painting versions need a protected table and somewhere to dry.
(AD) Browse precut snowflake craft kits on Amazon.
Check whether decorating supplies are included. A pack of plain wooden snowflakes may still need paint and brushes.
6. Snowy Night Pictures
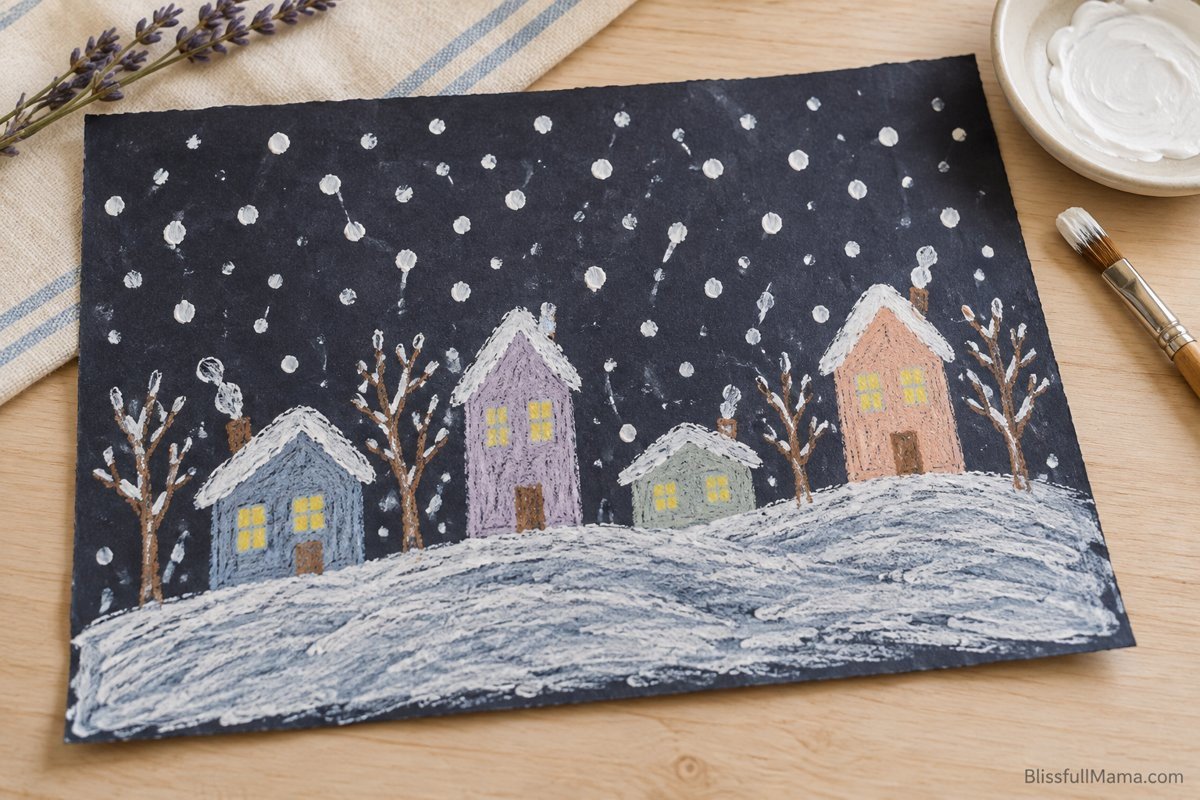
Dark blue paper and white paint give kids a starting point for a winter scene. They can draw a house with yellow windows, a forest, or a road disappearing behind a snowy hill.
My older boys both love Minecraft, so a snowy block-style village is a prompt I’d offer them while their younger brothers work on simpler pictures.
Suggested ages: preschool and elementary, with help for younger children.
What You’ll Need
- Dark blue or black construction paper
- White washable paint labeled for your child’s age
- A paintbrush and shallow paint dish
- Light-colored crayons
- A covering for the table
How to Make It
Draw the scene with crayons before adding paint. Pour a small amount of white paint into the dish, then show your child how to dab the brush onto the paper for falling snow. Add short strokes along rooftops and branches, and paint a snowy patch at the bottom.
I’d use brush dabs instead of flicking paint. Children can choose where the snow goes, and there’s less paint to wipe off the table afterward. A younger child can add snow around one large house you’ve drawn. Older children can write a story about who lives in their winter village.
Mess and Cleanup
Expect paint on brushes, fingers, and possibly sleeves. Protect the table, use washable supplies, and leave the pictures flat to dry. Check the paint label before assuming it will wash out of fabric.
Ready-to-Make Amazon Kit Option
For a prepared painting project, look up Made By Me Create Your Own Holiday Window Art. This offers a different activity from the snowy-night picture, so check the current listing’s designs, age guidance, included paints, and drying instructions before choosing it.
(AD) Find Made By Me Holiday Window Art kits on Amazon.
If your child enjoys Minecraft-inspired projects, my gift guide for boys who love Minecraft has more ideas for hands-on play.
7. Torn-Paper Polar Bear Collages
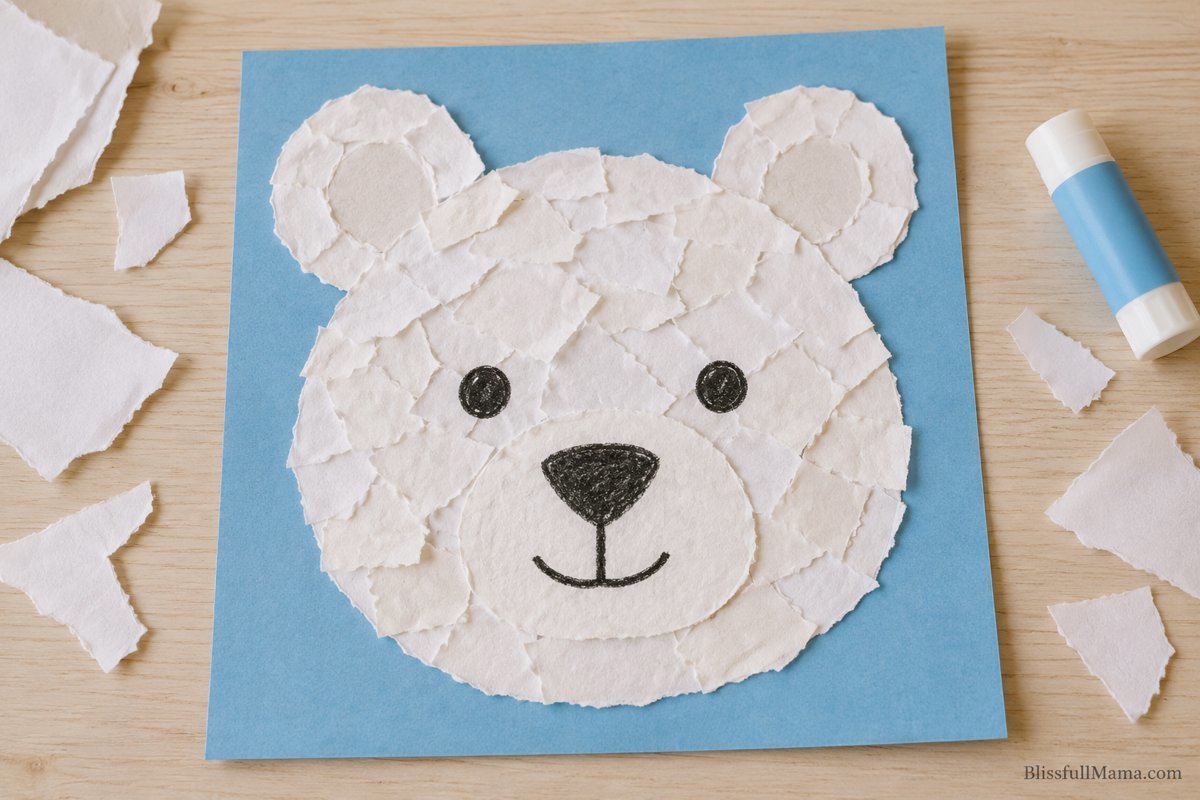
A polar bear’s face works well for children who want a recognizable animal without drawing every detail. The torn-paper fur can be uneven, and the bear can have a serious expression or a very silly grin.
Suggested ages: preschool and elementary. Younger children can join with large shapes and adult help.
What You’ll Need
- Blue construction paper
- White paper
- A glue stick
- A black crayon or marker
- Scissors for adult preparation
How to Make It
Cut a large white circle for the head and two smaller circles for ears. Glue them onto the blue paper, then cover the head with torn white paper pieces for fur.
Add a white oval muzzle near the bottom of the face. Draw a black nose, eyes, and mouth. Skip loose eyes and pom-poms at a table shared with a toddler.
Older children can add shoulders, falling snow, or a name beneath their bear. Younger children can stop after adding the face.
Mess and Cleanup
This is a paper-and-glue project. Keep the scraps in one bowl and clear them away before handing out the markers.
Ready-to-Make Amazon Kit Option
For an older child who prefers assembling a model, EUGY’s 3D Polar Bear is a named kit to look up. It’s a different project from the collage, so check its age label and assembly steps to see whether it suits your child.
(AD) View the EUGY 3D Polar Bear model kit on Amazon.
I’d keep the paper version for younger siblings and let an older child build the model beside them.
8. Tissue-Paper Snowflake Suncatchers
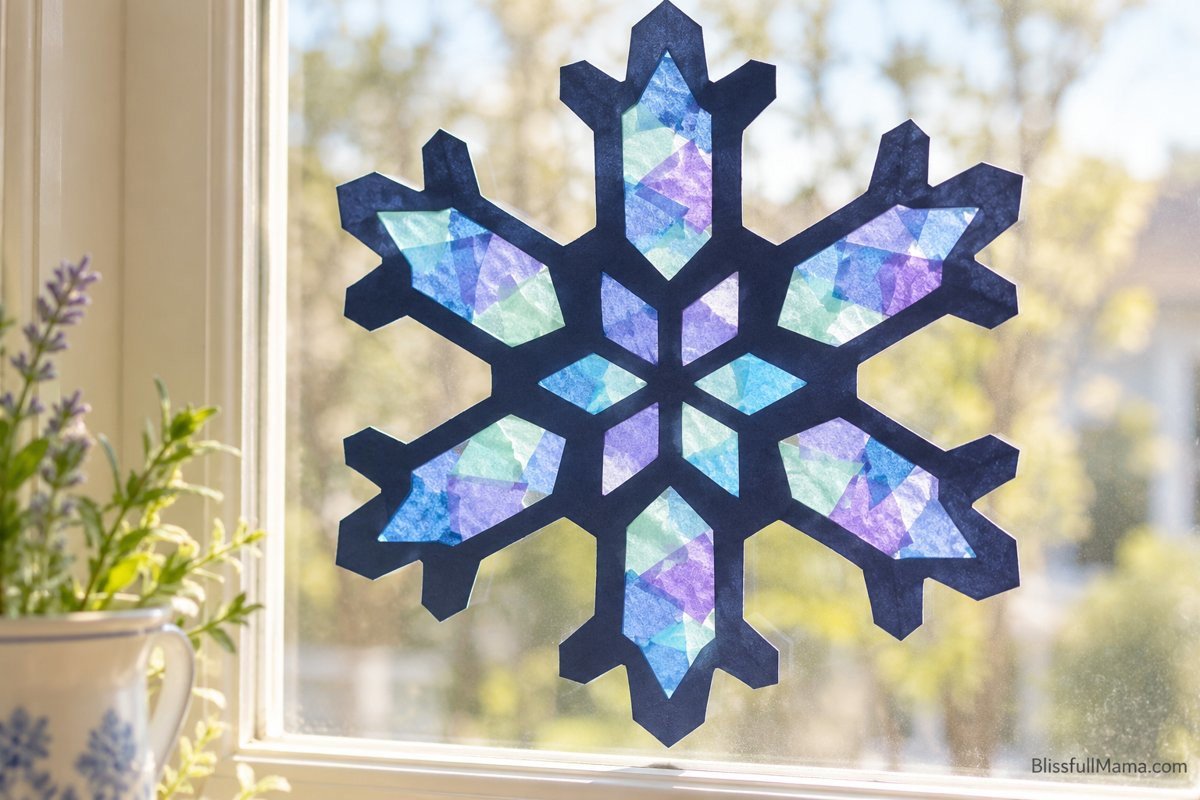
This is the craft I’d choose when the kids want something to put in the window. Blue, white, and purple tissue paper gives them plenty of color choices, and overlapping pieces change how the finished picture looks in the light.
Suggested ages: preschool and elementary, with adult preparation.
What You’ll Need
- Clear adhesive contact paper
- Blue, white, or purple tissue paper
- Dark cardstock for a frame
- Scissors
- Tape for displaying the finished craft
How to Make It
Cut a large snowflake silhouette from cardstock, then cut openings inside its arms, leaving a connected frame. An adult should prepare this part. A circle with a few snowflake shapes inside is an easier alternative.
Place the frame on the sticky side of contact paper. Let your child press tissue-paper pieces into the openings. Cover it with a second sheet of contact paper, smooth it down, and trim around the outside.
Have an adult tape the finished suncatcher onto a window within a safe reach.
Mess and Cleanup
There’s no wet glue or paint, but tissue scraps scatter easily. Set out a small handful at a time. Keep contact paper and its backing away from children’s faces, and collect the offcuts as you work.
Ready-to-Make Amazon Kit Option
Look for a winter tissue-paper suncatcher kit with precut frames and the decorating materials included. Some “suncatcher kits” are paint projects, so read the contents before buying.
(AD) Browse winter suncatcher craft kits on Amazon.
9. Little Clay Snowmen
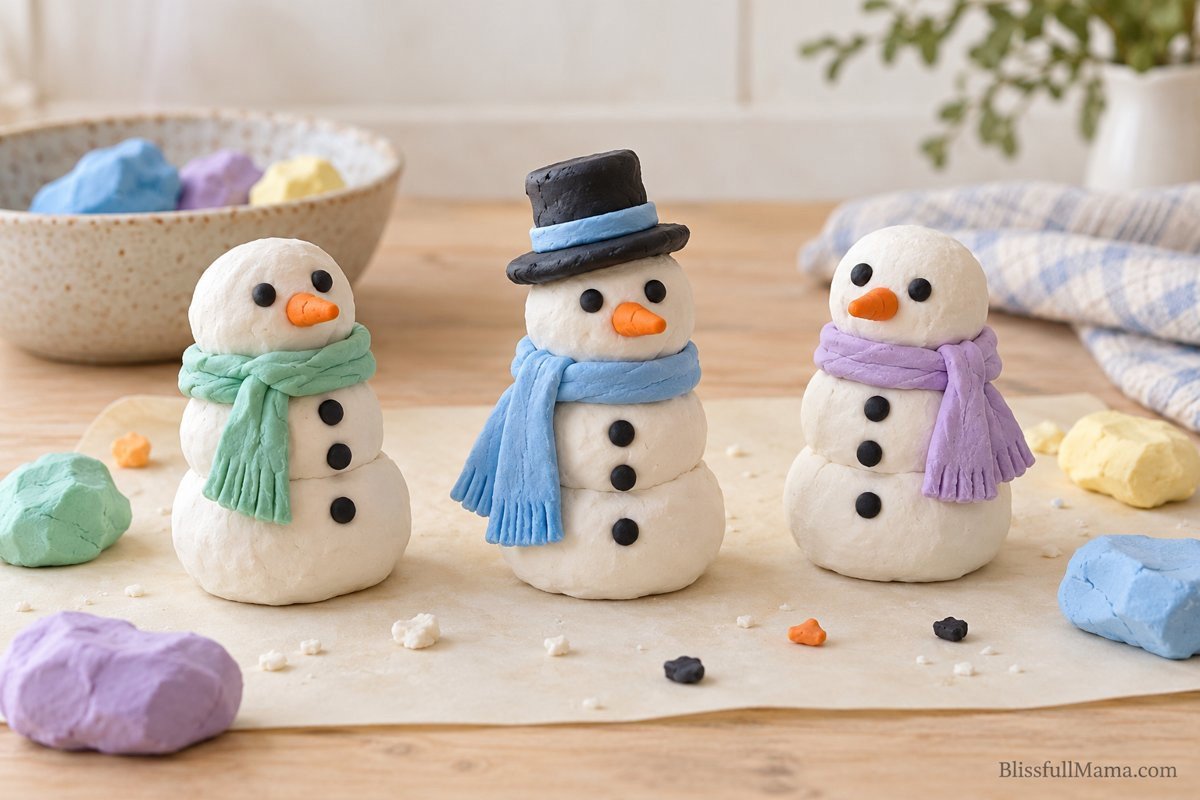
Clay snowmen give children a chance to build something that stands up. I’d offer this to kids who enjoy shaping and making characters, with enough space between their trays to keep everyone’s snowman pieces together.
Suggested ages: children who meet the clay or kit’s age guidance and no longer mouth materials.
What You’ll Need
- Child-appropriate white modeling clay
- Small amounts of orange, black, and colored clay
- A tray or washable mat
- The clay’s instructions for drying and storage
How to Make It
Roll two or three white balls and stack them from largest to smallest. Press the connecting surfaces together gently. Add a small orange nose, black clay eyes, and a colored scarf.
Older children can add a hat or make a snowman family. I’d make details from clay instead of adding toothpicks or loose buttons.
If you’re using air-dry clay, follow its drying instructions. If you’re using reusable modeling clay, your child can reshape the snowman later.
Mess and Cleanup
Expect clay crumbs and bits of color on the mat. Work over a tray, put unused clay away as directed, and wash hands afterward. My youngest would have a separate paper snowman activity beside me.
Ready-to-Make Amazon Kit Option
Dan&Darci Snowman Making Kit is a named option to look up for a prepared snowman-building activity. Check the current package’s age guidance, contents, and number of complete snowmen before ordering for siblings.
(AD) Find the Dan&Darci Snowman Making Kit on Amazon.
10. Winter Bookmarks
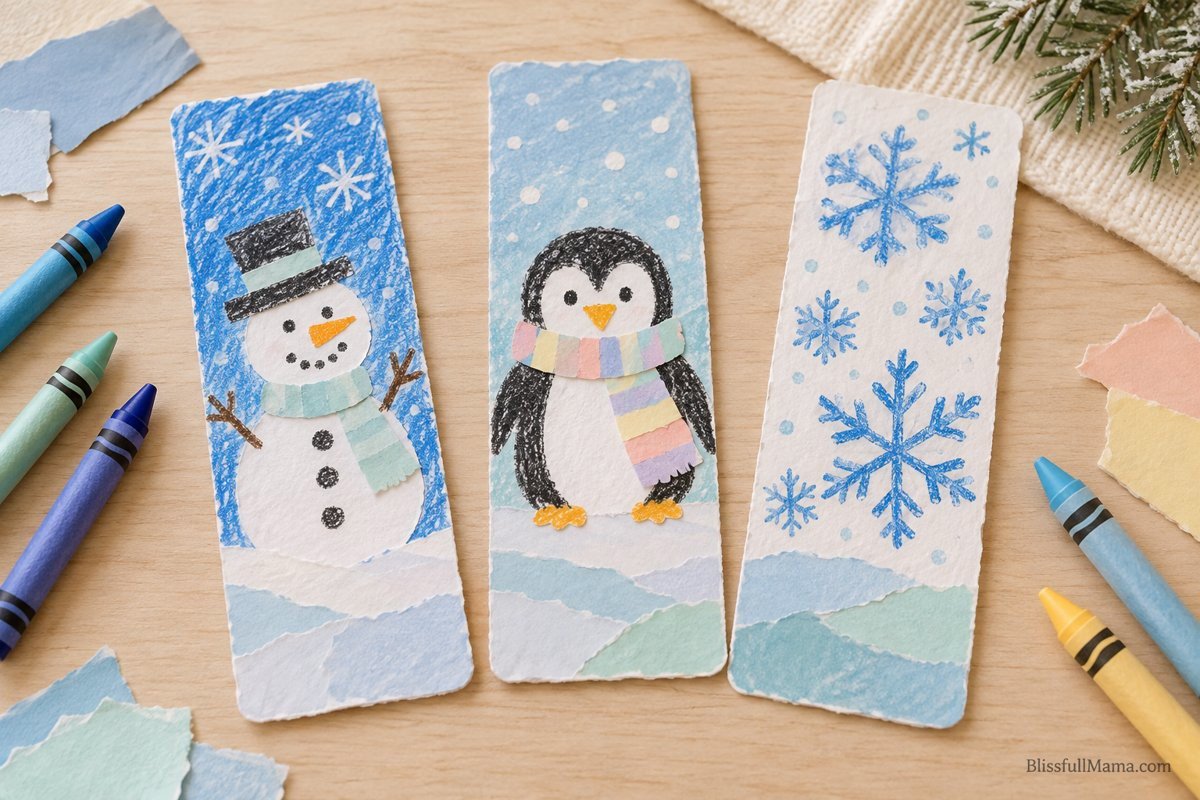
Bookmarks give the finished craft a job. A child can use one in a bedtime book, make one for a brother, or tuck one into a book they’re giving as a gift.
Suggested ages: preschool and elementary. Younger children can color an adult-cut strip.
What You’ll Need
- Cardstock
- Crayons or markers
- A glue stick
- Paper scraps
- Scissors
How to Make It
Cut cardstock into strips about two inches wide and six inches long. Let your child draw snowflakes, a penguin, or a snowman along the strip. Add a few flat paper shapes if they want a collage.
Keep decorations thin so the bookmark fits between pages. Skip hanging ribbons and loose beads for younger children.
Older kids can write their name or “My winter reading” down the middle. A younger child’s scribbles make a perfectly usable bookmark once you add their name.
Mess and Cleanup
This is one of the quickest projects to put away. Cap the markers, collect the scraps, and let any glued pieces dry before placing the bookmark inside a book.
Ready-to-Make Amazon Kit Option
Winlyn lists a winter snowflake bookmark craft kit on Amazon. It’s an option to compare if you want prepared pieces rather than cutting cardstock yourself. Check the age guidance and included decorations before giving it to younger children.
(AD) View the Winlyn snowflake bookmark craft kit on Amazon.
If Your Kids Craft Often, Consider an Art Easel
For a larger gift, I’d consider the Melissa & Doug Deluxe Wooden Standing Art Easel if your children already enjoy drawing and painting. Its double-sided design includes a dry-erase board and a chalkboard.
(AD) Find the Melissa & Doug Deluxe Standing Art Easel on Amazon.
Check the current package for included supplies and measure where it will stand. I’d buy an easel for repeated use through the year. A protected table is enough for every paper craft in this post.
For activities ideas , browse (AD) my Amazon storefront for kids’ activities and family finds. If you order supplies regularly, (AD) check Amazon Prime’s current membership options before deciding whether the available benefits fit your family.
Frequently Asked Questions About Winter Crafts for Kids
Which winter crafts work best for toddlers?
I’d begin with a large mitten outline to color or a paper snowman made with adult help. Use materials labeled for your child’s age, stay beside them, and avoid small decorations. If your child still mouths paper or supplies, choose an age-appropriate activity without those loose materials.
How can children of different ages craft together?
Give everyone the same theme and adjust the steps. You can cut a preschooler’s shapes while an older child draws and cuts their own. My two-year-old doesn’t need the same kit as his nine-year-old brother to sit at the table with us.
Which projects have the least cleanup?
The crayon-only mitten, paper bookmarks, and torn-paper snowman are the options I’d choose. Paper snowflakes avoid wet supplies, although they create more tiny scraps. Paint, clay, and filled snow globes need more setup and cleanup.
Are ready-to-make craft kits worth buying?
I’d buy one when the prepared pieces save a job I don’t have time for, or when an older child wants a model or globe that’s different from our paper projects. Check how many finished crafts the box makes, whether supplies are missing, and whether the age label fits your child.
What can I do with all the finished crafts?
Choose one display spot and let each child pick what goes there. Bookmarks can go straight into books once dry. Paper snow globes can become cards. Take a photo of larger pieces before deciding which ones to keep.
Choose One Craft for Your Next Indoor Afternoon
I’d start with the torn-paper snowman or mitten collage, then save a painting project for a day when I can sit with the boys and help. Set out enough supplies for one activity and leave space for them to make it their own. If one child finishes early, he can add a background or start a second picture while his brothers keep working.
For something to do after the craft table is clear, my indoor activities for boys includes more ideas for playing at home. Although that post was written for summer, you can use the indoor activities during winter too.
Get the Winter Craft Basket Pack
Want the shapes ready for your next craft afternoon? Sign up for my emails to get the Winter Craft Basket Pack, with snowman circles, a mitten outline, penguin pieces, a paper snow globe template, and a supply checklist.
Print the page you need, set out the supplies, and let your kids choose their colors.